I’m sharing my experience setting up a Windows guest VM with GPU passthrough to dodge dual‑boot drama: no more Windows fast‑boot drive locks, no more Linux playing whack‑a‑GRUB, and, yes, because I’m lazy.
I relied mostly on the following guide from Quantum 5. It’s a good starting point for getting Windows installed on the VM.
Not a zero‑to‑hero guide
This write‑up assumes you already know your way around Linux. You should already be comfortable with Linux CLI basics (sudo, editing /etc, permissions/groups...) and managing GRUB/kernel flags.
Prerequisites:
QEMU setup
Installed QEMU with
virt-managerand all the correct group permissions for devices so that root access is not needed.Using
virt-manager→ File → New Virtual Machine → Local install media → Select your ISO → manually choose Windows 11 → choose the other settings.
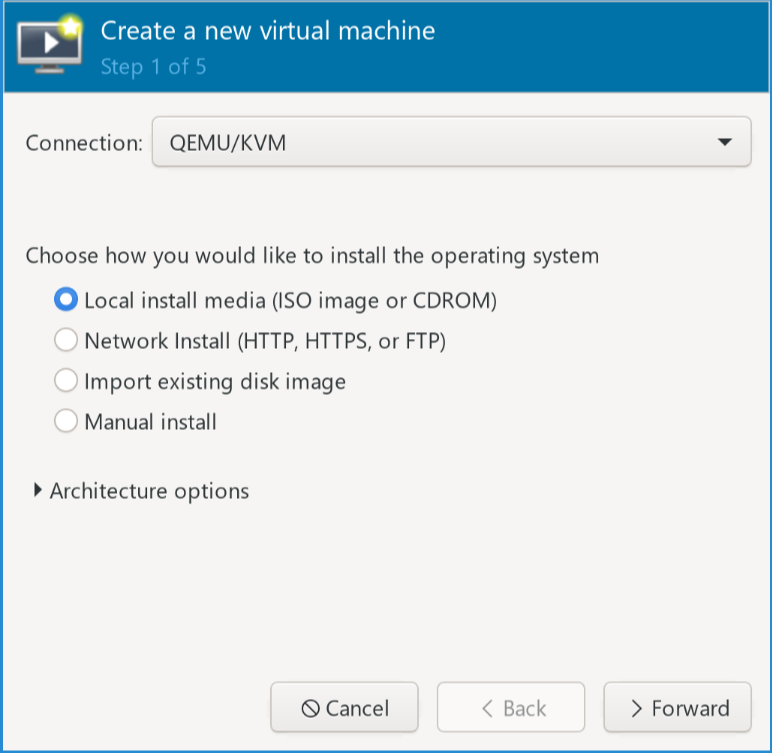
(a)Starting window
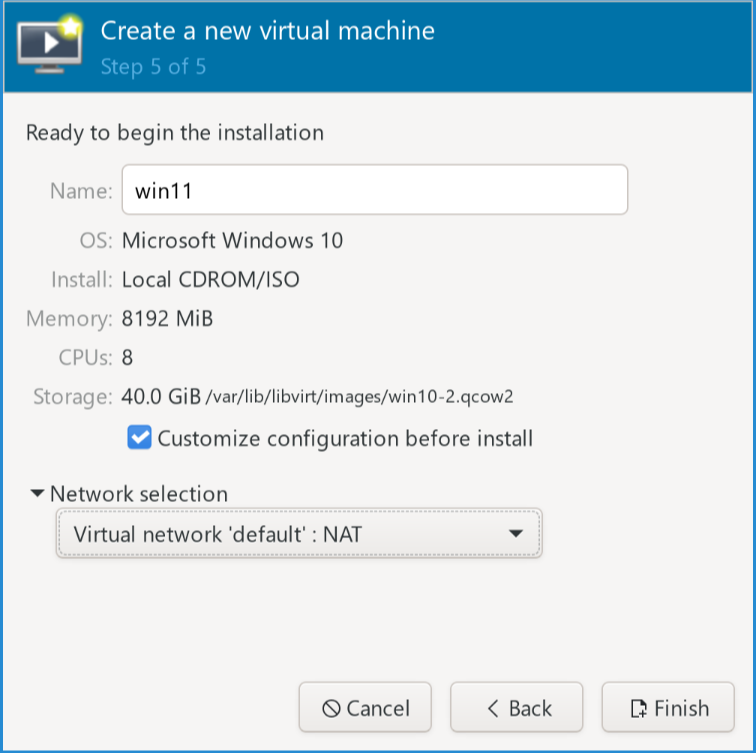
(b)Picking disks
Make sure to choose “Customize configuration before install”. Change the firmware in Overview to
OVMF_CODE.secboot.fd(or..._4M.fd).In SATA Disk 1, choose
VirtIOfor bus.Add hardware → Storage → select the VirtIO ISO folder → CD‑ROM (type) and SATA (bus).
Add hardware → TPM → Emulated (it should have been added by default).
Begin installation.
At the drive partitioning step, choose Load driver → choose viostor\w11\amd64\viostor.inf. Windows doesn’t speak VirtIO out of the box, so we’re teaching it a few new words.
Once the installation is done, go to Device Manager and use the VirtIO ISO to install the missing drivers, especially for the display (instead of the generic display).
Host configuration
Time to befriend your motherboard’s secret clubs (IOMMU groups) and gently convince the GPU to work for your VM instead of your host. We’ll configure QEMU for virtual access to PCI devices on the host.
Custom Linux kernel
If you compile the Linux kernel: the IOMMU module should be in the kernel:
Device Drivers --->
  [*] IOMMU Hardware Support --->
            Generic IOMMU Pagetable Support ----
      [*]   AMD IOMMU support
      <*>     AMD IOMMU Version 2 driver
      [*]   Support for Intel IOMMU using DMA Remapping Devices
      [*]     Support for Shared Virtual Memory with Intel IOMMU
      [*]     Enable Intel DMA Remapping Devices by default
      [*]   Support for Interrupt Remapping
Device Drivers --->
  <M> VFIO Non-Privileged userspace driver framework --->
      [*]   VFIO No-IOMMU support ----
      <M>   VFIO support for PCI devices
      [*]     VFIO PCI support for VGA devices
      < >   Mediated device driver framework
Make sure
vmxorsvmis available:
grep --color -E "vmx|svm" /proc/cpuinfoAdd these to
GRUB_CMDLINE_LINUXin/etc/default/gruband rebuild grub (or pass them manually at boot after thelinux vmlinuz...line)
iommu=pt intel_iommu=on pcie_acs_override=downstream,multifunctionAdd
vfiomodules to be loaded at boot
#/etc/modules-load.d/vfio.conf
vfio_pci
vfio
vfio_iommu_type1
vfio_virqfd
You can check IOMMU status:
dmesg | grep "IOMMU"“DMAR: IOMMU feature ... inconsistent”
For RTX 3090, I was getting DMAR: IOMMU feature ... inconsistent. Someone here talked about disabling Resizable BAR in the BIOS: it didn’t work. It was due to the NVIDIA driver taking hold of the GPU before vfio-pci. So make sure you use the rules above for kernel module probing. See Binding GPU to VFIO at boot time.
GPU passthrough
Figuring out the IOMMU group
An IOMMU Group is the smallest unit you can pass to the VM. Think of it like a friend group at a party: they arrived together, they leave together. For instance, a USB hub might have multiple ports that all share the same IOMMU Group. In that case, you can’t pass individual ports to the VM.
You can list IOMMU groups using (similar to lspci) to get the IDs:
#!/bin/bash
echo 'PCIe devices'
shopt -s nullglob
for g in $(find /sys/kernel/iommu_groups/ -mindepth 1 -maxdepth 1 -type d | sort -V); do
    echo "IOMMU Group ${g##*/}:"
    for d in "$g/devices/"*; do
        echo -e "\t$(lspci -nns ${d##*/})"
    done
done

echo
echo 'USB Controllers'
for usb_ctrl in /sys/bus/pci/devices/*/usb*; do
    pci_path="${usb_ctrl%/*}"
    iommu_group="$(readlink $pci_path/iommu_group)"
    echo "Bus $(cat $usb_ctrl/busnum) --> ${pci_path##*/} (IOMMU group ${iommu_group##*/})"
    lsusb -s "${usb_ctrl#*/usb}:"
    echo
done
We’re interested in the GPU IOMMU group:
IOMMU Group 13:
	01:00.0 VGA compatible controller [0300]: NVIDIA Corporation GA102 [GeForce RTX 3090] [10de:2204] (rev a1)
	01:00.1 Audio device [0403]: NVIDIA Corporation GA102 High Definition Audio Controller [10de:1aef] (rev a1)
In this case, we can not isolate the GPU’s audio interface from the VGA controller.
10de:2204 and 10de:1aef are the IDs we’re going to use to identify the devices. We can also use lspci -nnk to get the IDs of the GPU and its audio controller.
Binding GPU to VFIO at boot time
We have to change the kernel module probing config to make sure VFIO grabs the GPU before the NVIDIA driver does:
Use
lspci -nnk -d 10de:2204to see which kernel driver is used (before VFIO)
01:00.0 VGA compatible controller [0300]: NVIDIA Corporation GA102 [GeForce RTX 3090] [10de:2204] (rev a1)
	Subsystem: NVIDIA Corporation GA102 [GeForce RTX 3090] [10de:147d]
	Kernel driver in use: nvidia
	Kernel modules: nouveau, nvidia_drm, nvidia
We change the
modprobeconfig and reboot
#/etc/modprobe.d/vfio.conf
# make vfio-pci load before nouveau/nvidia
# nvidia blacklisted nouveau
softdep nvidia pre: vfio-pci
# bind vfio to NVIDIA RTX3090 GPU
options vfio-pci ids=10de:1aef,10de:2204
Kernel driver should be vfio-pci. The Arch Linux wiki mentions using softdep nvidia pre: vfio-pci instead of nouveau (see above, it depends on the kernel driver) to make sure vfio-pci takes control of the device before nvidia.
Once that is done, we reboot and check the used driver:
lspci -nnk -d 10de:2204
01:00.0 VGA compatible controller [0300]: NVIDIA Corporation GA102 [GeForce RTX 3090] [10de:2204] (rev a1)
	Subsystem: NVIDIA Corporation GA102 [GeForce RTX 3090] [10de:147d]
	Kernel driver in use: vfio-pci
	Kernel modules: nouveau, nvidia_drm, nvidia
Perfect!
Now we just need to add the PCI hardware to the VM: Add Hardware → PCI Host Device → Select GPU. See the guide from quantum.ca for screenshots.
The same process can be used to pass the GPU to Linux guests. I find it useful when testing code or system-wide dependencies on guests without having to alter my Linux host packages.
Setting up VM CPU and display
CPU cores
Pin virtual CPUs so each thread pair maps to the same physical core. It’s the buddy system for threads.
❯ lscpu -e
CPU NODE SOCKET CORE L1d:L1i:L2:L3 ONLINE    MAXMHZ   MINMHZ       MHZ
  0    0      0    0 0:0:0:0          yes 4900.0000 800.0000 4681.2090
  1    0      0    1 1:1:1:0          yes 4900.0000 800.0000  800.0000
  2    0      0    2 2:2:2:0          yes 4900.0000 800.0000 4676.6958
  3    0      0    3 3:3:3:0          yes 4900.0000 800.0000 4613.0669
  4    0      0    4 4:4:4:0          yes 5000.0000 800.0000 4647.4458
  5    0      0    5 5:5:5:0          yes 5000.0000 800.0000 4672.6479
  6    0      0    6 6:6:6:0          yes 4900.0000 800.0000 4679.0068
  7    0      0    7 7:7:7:0          yes 4900.0000 800.0000 4627.2822
  8    0      0    0 0:0:0:0          yes 4900.0000 800.0000  800.0000
  9    0      0    1 1:1:1:0          yes 4900.0000 800.0000 4644.9258
 10    0      0    2 2:2:2:0          yes 4900.0000 800.0000 4620.9731
 11    0      0    3 3:3:3:0          yes 4900.0000 800.0000 4644.2139
 12    0      0    4 4:4:4:0          yes 5000.0000 800.0000  800.0000
 13    0      0    5 5:5:5:0          yes 5000.0000 800.0000  800.0000
 14    0      0    6 6:6:6:0          yes 4900.0000 800.0000 4635.7510
 15    0      0    7 7:7:7:0          yes 4900.0000 800.0000 4760.7310
In this case, I’ll choose (0,8,1,9,3,10,4,11) with cores (0,1,2,3) added after the devices section:
<cputune>
    <vcpupin vcpu='0' cpuset='0'/>
    <vcpupin vcpu='8' cpuset='0'/>
    <vcpupin vcpu='1' cpuset='1'/>
    <vcpupin vcpu='9' cpuset='1'/>
    <vcpupin vcpu='2'  cpuset='2'/>
    <vcpupin vcpu='10' cpuset='2'/>
    <vcpupin vcpu='3'  cpuset='3'/>
    <vcpupin vcpu='11' cpuset='3'/>
</cputune>
With 4 cores and 2 threads per core (Intel)
<cpu mode='host-passthrough' check='none' migratable='off'>
    <topology sockets='1' dies='1' cores='4' threads='2'/>
    <cache mode='passthrough'/>
</cpu>
We replace the
featuressection
  <features>
    <acpi/>
    <apic/>
    <hyperv mode='custom'>
      <relaxed state='on'/>
      <vapic state='on'/>
      <spinlocks state='on' retries='8191'/>
      <vpindex state='on'/>
      <synic state='on'/>
      <stimer state='on'>
        <direct state='on'/>
      </stimer>
      <reset state='on'/>
      <vendor_id state='on' value='ayghri'/>
      <frequencies state='on'/>
      <reenlightenment state='on'/>
      <tlbflush state='on'/>
      <ipi state='on'/>
      <evmcs state='off'/>
    </hyperv>
    <kvm>
      <hidden state='on'/>
    </kvm>
    <vmport state='off'/>
    <ioapic driver='kvm'/>
  </features>
You can find the complete VM XML here.
Looking Glass
Looking Glass is like a magic mirror for your VM. In my case, once the GPU is passed through, I usually just switch my monitor’s second HDMI input to the Windows session. But with Looking Glass, I can keep using the host display and hot‑swap control—capture mouse/keyboard with Right‑CTRL and you’re in.
The idea behind Looking Glass is to transfer the frames generated by the GPU to a shared tmp file with the host (in RAM) and display them on the host. This way, there is no need to switch the display. You can use the host display to interact with the guest directly with little frame drop.
The first thing is to drop the memory balloon in the XML file: it’s used to reclaim unused memory from the guest, it degrades performance with GPU passthrough
<memballoon model="none"/>The next part is to create the shared memory file
/dev/shm/looking-glassand allowkvm, qemugroups to access it. Theqemuuser is supposed to be inkvmgroup
Another way is to instantiate the file automatically at boot by creating the file:
# cat /usr/lib/tmpfiles.d/looking-glass.conf
f /dev/shm/looking-glass 0660 qemu qemu -
(This is done automatically when you install Looking Glass on Gentoo).
We add this memory device to our VM. To determine the memory size refer to the documentation
    <shmem name='looking-glass'>
      <model type='ivshmem-plain'/>
      <size unit='M'>256</size>
    </shmem>
I’m not going to detail more about Looking Glass. Their documentation is clear enough (I think). I use the following command to launch the client on the host as the VM starts:
looking-glass-client input:escapeKey=KEY_RIGHTCTRL win:size=3840x2160This way, I use Right-Ctrl to toggle keyboard/mouse capture by the guest.
Hot-swapping GPU with VMs
The main challenge with hot-swapping is that the Linux desktop’s display server (like X Server or Wayland) often claims the GPU at boot, preventing it from being passed to the VM. Even if we bind the GPU to the vfio-pci driver at boot (as done in the previous guide), we need a way to give it back to the host when the VM is not running.
You can check if a display server is using your GPU with:
lsof /dev/nvidia*If you see a process like Xorg or your compositor in the output, the host is using the GPU.
There 2 solutions:
A script to manually switch the GPU drivers.
Libvirt hooks to automate the switching process when the VM starts and stops.
Manual GPU Switching
We’ll create a service to handle the driver switching. This example uses OpenRC (common on Gentoo), systemd would require figuring out the the dependencies so it starts before the display server.
The idea is to:
Bind to
vfio-pcibefore the display server grabs itBind to
nvidiaafter the display server
The Service Script
Create a service file at /etc/init.d/gpu-passthrough-manager:
#!/sbin/openrc-run
#
# Service to manage GPU driver bindings for VM passthrough.
#
# To find your GPU device IDs, use:
# lspci -nn | grep -i nvidia
#
# For an NVIDIA RTX 3080, you might see:
# 01:00.0 VGA compatible controller [0300]: NVIDIA Corporation GA102 [GeForce RTX 3080] [10de:2206] (rev a1)
# 01:00.1 Audio device [0403]: NVIDIA Corporation GA102 High Definition Audio Controller [10de:228b] (rev a1)
#
# The device IDs are '0000:01:00.0' and '0000:01:00.1'.
#
description="Manages GPU driver binding for passthrough"
PIDFILE="/run/gpu-passthrough-manager.pid"

# Your GPU's PCI device IDs.
# Replace these with your own.
GPU_VIDEO_ID="0000:01:00.0"
GPU_AUDIO_ID="0000:01:00.1"

depend() {
	# This service should run after the display manager has started.
	use display-manager
}

function bind_driver_device(){
    driver=$1
    device=$2
    # Use tee to write to the sysfs file as root
    /usr/bin/tee /sys/bus/pci/drivers/"$driver"/bind <<< "$device" >/dev/null
}

function unbind_driver_device(){
    driver=$1
    device=$2
    /usr/bin/tee /sys/bus/pci/drivers/"$driver"/unbind <<< "$device" >/dev/null
}

start() {
	ebegin "Binding GPU to vfio-pci for VM"
        # Unload host drivers
        /sbin/modprobe -r nvidia_drm nvidia_modeset nvidia_uvm nvidia
        /sbin/modprobe -r snd_hda_intel

        # Bind to vfio-pci
        /sbin/modprobe vfio-pci
        bind_driver_device "vfio-pci" "$GPU_VIDEO_ID"
        bind_driver_device "vfio-pci" "$GPU_AUDIO_ID"
	eend $?
}

stop() {
	ebegin "Binding GPU to nvidia for Host"
        # Unbind from vfio-pci
        unbind_driver_device "vfio-pci" "$GPU_VIDEO_ID"
        unbind_driver_device "vfio-pci" "$GPU_AUDIO_ID"

        # Load host drivers
        /sbin/modprobe nvidia
        /sbin/modprobe snd_hda_intel

        # Bind to host drivers
        bind_driver_device "nvidia" "$GPU_VIDEO_ID"
        bind_driver_device "snd_hda_intel" "$GPU_AUDIO_ID"
	eend $?
}
Make sure to chmod +x the service script and add it to the default run level:
chmod +x /etc/init.d/gpu-passthrough-manager

# Test the service
# Check original driver (should be vfio-pci from boot)
lspci -nnk -d $(lspci -nn | grep -i nvidia | cut -d' ' -f1)

# Give GPU to host
rc-service gpu-passthrough-manager stop
lspci -nnk -d $(lspci -nn | grep -i nvidia | cut -d' ' -f1) # Should show nvidia driver

# Give GPU to VM
rc-service gpu-passthrough-manager start
lspci -nnk -d $(lspci -nn | grep -i nvidia | cut -d' ' -f1) # Should show vfio-pci driver
This setup assumes you have already configured vfio-pci to grab the GPU at boot, as described in the previous guide. The stop command gives the GPU to the host, and start prepares it for the VM.
Preventing X from using the GPU
If you have an integrated GPU (iGPU), you can force the X server to only use that, leaving the dedicated GPU free.
Create a configuration file like /etc/X11/xorg.conf.d/90-igpu.conf:
# /etc/X11/xorg.conf.d/90-igpu.conf
#
# This forces Xorg to use the integrated GPU and ignore others.
# Find your iGPU's BusID with:
# lspci | grep -i vga
#
# Example for an Intel iGPU:
# 00:02.0 VGA compatible controller: Intel Corporation CoffeeLake-S GT2 [UHD Graphics 630]
# The BusID is "PCI:0:2:0".

Section "ServerLayout"
    Identifier "iGPU_Layout"
    Screen 0 "iGPU_Screen"
EndSection

Section "Device"
    Identifier "iGPU_Device"
    Driver "modesetting" # Or "intel" for older chips
    BusID "PCI:0:2:0" # Replace with your iGPU's BusID
EndSection

Section "Screen"
    Identifier "iGPU_Screen"
    Device "iGPU_Device"
EndSection
This configuration explicitly tells the X server which GPU to use. This does NOT solve the problem mentioned before: X server might still be locking /dev/nvidia* even when it does not use it.
Automating with Libvirt Hooks
Manually running the service is tedious. We can use libvirt hooks to automate it. When a VM event (like “start” or “stop”) occurs, libvirt can run scripts for us.
The main hook script is /etc/libvirt/hooks/qemu. It acts as a dispatcher for other scripts. You might need to create the hooks folder.
When a VM event is triggered, libvirt calls:
/etc/libvirt/hooks/qemu guest_name hook_name state_name ....For more on hooks: https://
A Toy QEMU Script
To understand what’s happening, we can use the following script to log the call:
#!/usr/bin/env bash
GUEST_NAME="$1"
HOOK_NAME="$2"
STATE_NAME="$3"
MISC="${@:4}"

echo guest, hook, state, misc  >> /tmp/qemu_hooks.log
echo "$GUEST_NAME", "$HOOK_NAME", "$STATE_NAME", "$MISC" >> /tmp/qemu_hooks.log
place it as /etc/libvirt/hooks/qemu and chmod +x it. We have to restart libvirtd service for the hook to be loaded.
When we perform a normal start/shutdown cycle, we get:
guest,     hook,    state, misc
ArchNoGui, prepare, begin, -
ArchNoGui, start,   begin, -
ArchNoGui, started, begin, -
ArchNoGui, stopped, end,   -
ArchNoGui, release, end,   -
ArchNoGui is the name of the guest, its XML config is located at /etc/libvirt/qemu/ArchNoGui.xml
The Dispatcher Script
To manage the hooks, we’ll use the helper script by SharpWipf as our /etc/libvirt/hooks/qemu, which executes the script /etc/libvirtd/hooks/qemu.d/guest/hook/state whenever a hook is called.
Now, create scripts that will be called by the dispatcher. Replace Win11Nvidia with the name of your VM.
Prepare GPU for VM
This script runs when you start the VM. It binds the GPU to vfio-pci.
Create the file /etc/libvirt/hooks/qemu.d/Win11Nvidia/prepare/begin/bind_vfio.sh:
#!/usr/bin/env bash
#
# This script is run when the VM is about to start.
# It binds the GPU to the vfio-pci driver.

# Use the service we created earlier.
/sbin/rc-service gpu-passthrough-manager start
Return GPU to Host (on VM stop):
This script runs after the VM has shut down. It gives the GPU back to the host.
Create the file /etc/libvirt/hooks/qemu.d/Win11Nvidia/release/end/unbind_vfio.sh:
#!/usr/bin/env bash
#
# This script is run after the VM has been shut down.
# It gives the GPU back to the host by binding it to the nvidia driver.

# Use the service we created earlier.
/sbin/rc-service gpu-passthrough-manager stop
Make both scripts executable:
chmod +x /etc/libvirt/hooks/qemu.d/Win11Nvidia/prepare/begin/bind_vfio.sh
chmod +x /etc/libvirt/hooks/qemu.d/Win11Nvidia/release/end/unbind_vfio.sh
Finally, restart the libvirt daemon to apply the changes:
rc-service libvirtd restartNow, when you start your Win11Nvidia VM, the prepare hook will automatically run the gpu-passthrough-manager start command, binding the GPU to vfio-pci. When you shut down the VM, the release hook will run gpu-passthrough-manager stop, returning the GPU to your Linux host.
Notes
Dropping Looking Glass
I’ve finally decided not to use Looking Glass for my daily workflow. It’s great, but I noticed a bit of lag during long GPU‑heavy sessions. Your mileage may vary, and plenty of folks swear by it.
Instead, I passthrough the mouse and keyboard and switch to HDMI (GPU) after launching the Windows 11 VM. This means the Linux host loses access to those devices while the guest is running. Alternatives:
use a USB hub switch (~$20) and passthrough the USB port (IOMMU group)
If 1. not possible, pass the keyboard/mouse in
--livemode and use the USB switch as a “physical unplug” button.
Using a SATA drive for Windows
After reinstalling my Linux OS a few times, it was a bit cumbersome to move around the disk files. I decided to use a small 120GB SATA drive that is passed directly to the VM and that shows up in the VM as any other SSD. The other advantage of such method is that it can even be used in dual-boot if needed.